MYJOBS
About
Portlet for managing jobs.
Installation
Deploy MyJobs.war with: cp MyJobs $LIFERAY_HOME/deploy/
Watch the Liferay’ server.log file till: ‘MyJobs successfully deployed’
Requirements
Application registration in the GridOperations table is mandatory for the MyJobs portlet

How to get GridOperations values
- id – Just a numeric value; ‘9’ historically used by Tester Apps
- portal – Value added in the preference - liferay control panel
- description – Use any human readable application description
GridOperations values will be carefully selected for production portals
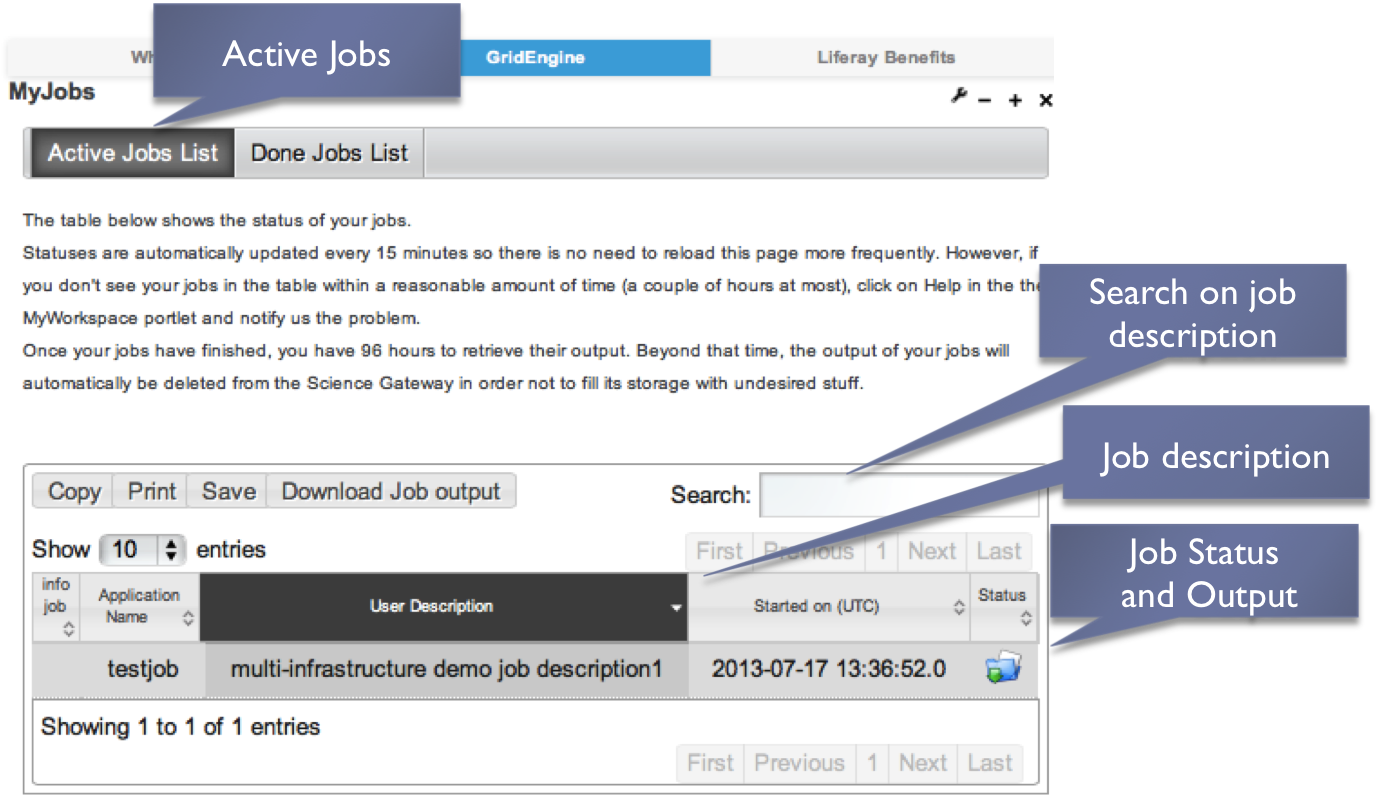
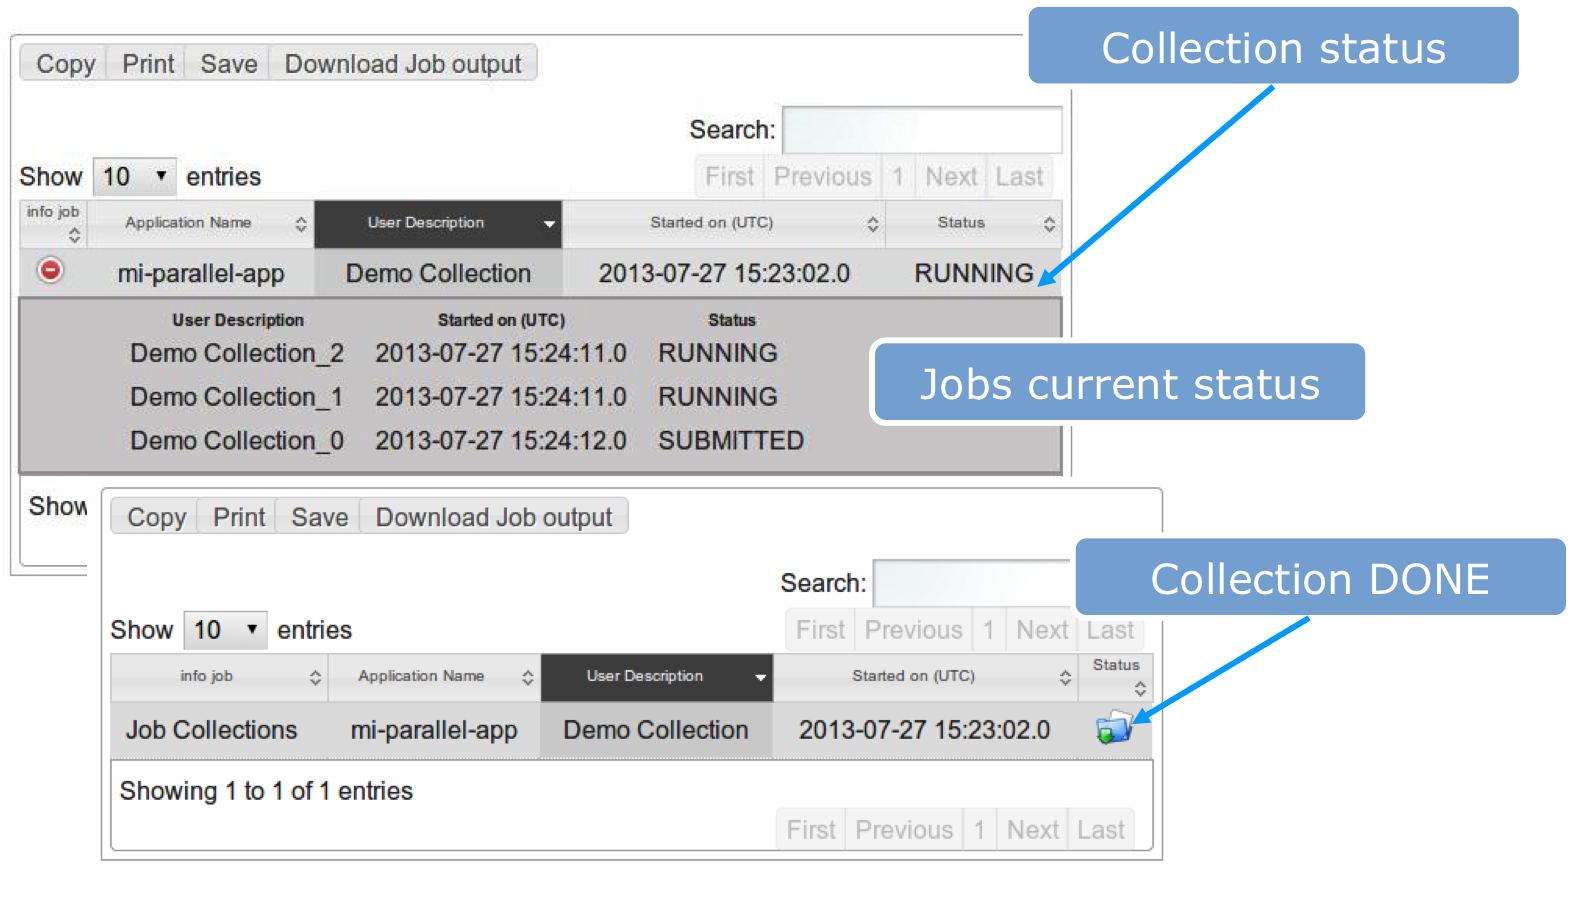
To check the job status and to retrieve the output when job is done, you should install our MyJob portlet, in order to do this you have to make some configuration in your liferay environment.
- Open the Glassfish Administration Console (http://localhost:4848).
- Create a new JDBC connection pool for MyJob portlet:
** On the left menu select Resources > JDBC > JDBC Connection Pools
Click New... to create a new pool with the following settings:

Pool Name: usertrackingPool

ResourceType: javax.sql.DataSource

Database Driver Vendor: select MySql

Click Next and left the default parameters;

Select and remove all the properties from the "Additional Properties" table (buttom page);

Click on "Add" and create the following three properties:

Name: Url, Value: jdbc:mysql://localhost:3306/userstracking

Name: User, Value: tracking_user

Name: Password, Value: usertracking

Click on "Finish" button to save configuration.
Click on the ‘Ping’ button to test the connection pool. If everything is working fine the “Ping Succeded” message should appear on top.
Create a new JDBC Resource:
On the left menu select Resources > JDBC > JDBC Resources
Click New... to create a new JDBC Resource with the following settings:
JNDI Name: jdbc/UserTrackingPool
Pool Name: select usertrackingPool
Click on “Finish” button to save configuration.
Restart Glassfish
When restart procedure has completed you can proceed with the installation of the MyJob portlet.